AgentSuiteLocal
User Manual — AgentSuiteLocal v1.0.0
AgentSuiteLocal runs seven specialist AI agents on your machine. Each agent takes a one-sentence business goal, walks a five-stage pipeline (intake → extract → spec → execute → QA), and writes a folder of structured markdown artifacts to your disk. You review them, approve what’s good, and the approved output feeds every future run on that project.
That’s the whole loop. Everything in this app is a UI on top of it. All processing happens locally — nothing leaves your machine unless you explicitly configure a cloud API key.
Manual version: v1.0.0 · Last updated: 2026-05-08
1. Installation walkthrough
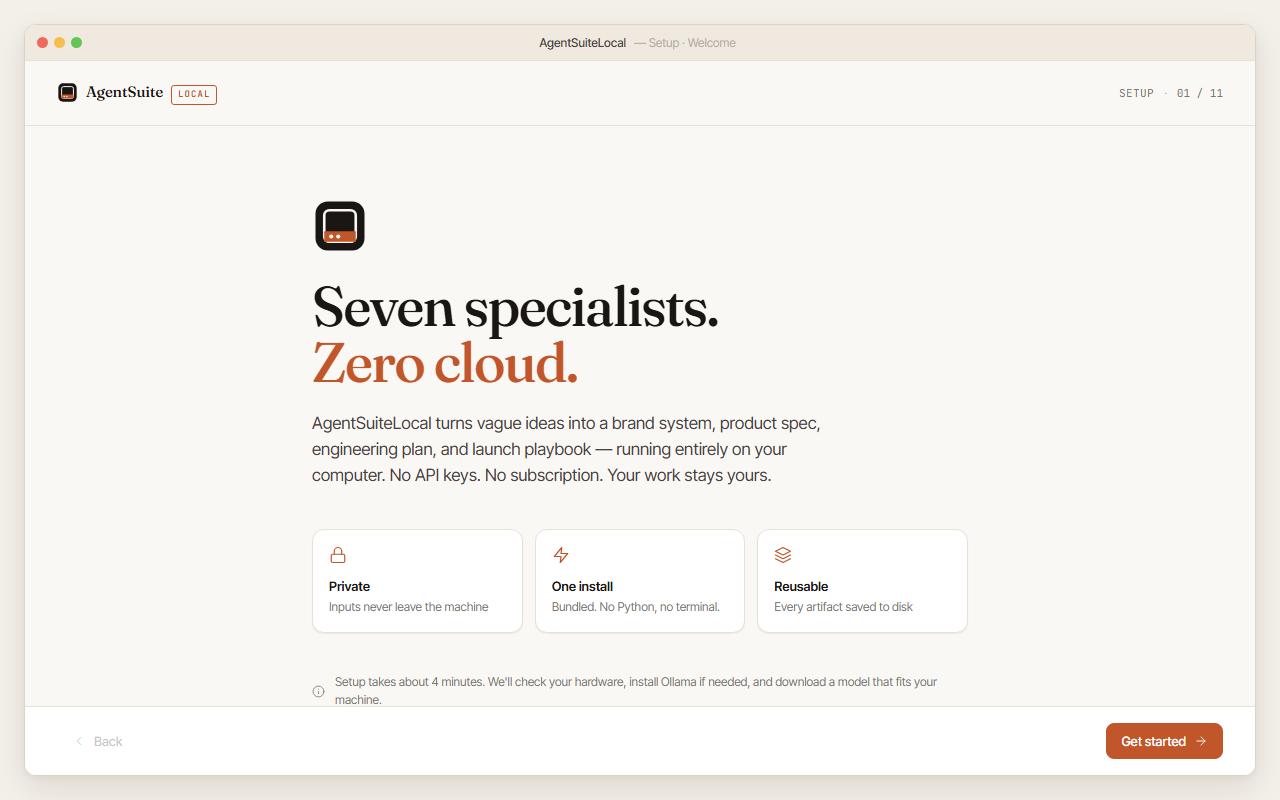 The installer welcome screen — your first view when you launch AgentSuiteLocal for the first time.
The installer runs once and walks 6 short steps. After setup completes it doesn’t appear again unless you reinstall.
Windows SmartScreen note: Windows may show “Windows protected your PC” before the installer opens because AgentSuiteLocal is free, open-source beta software and the installer is unsigned. If you downloaded it from the official GitHub Releases page, click More info and then Run anyway to continue.
| Step | Screen | What happens |
|---|---|---|
| 1 | Welcome | Intro screen. Click Get started. |
| 2 | License & privacy | Read the license. Check the box. Click I agree. |
| 3 | Hardware & model tier | The app probes your CPU, RAM, and disk and recommends a tier — Light (8 GB RAM, gemma4:e2b), Balanced (16 GB RAM, gemma4:e4b, recommended), or Pro (32 GB RAM, gemma4:26b). Pick one. |
| 4 | Ollama & model download | Confirms Ollama is running, then pulls the model for the tier you chose. Includes a 3-attempt retry loop with backoff. If Ollama isn’t running yet, open the Ollama app and the screen unlocks automatically. |
| 5 | Smoke test | Runs four sequential checks: Ollama reachable, model loaded, API healthy, real test inference. Each check shows a green tick or a fix card with a specific action. Skip smoke test is available with a confirmation if you need to bypass it (the app may not work after skipping). |
| 6 | You’re set up | Click Launch AgentSuiteLocal to open the main app. |
What changed from earlier versions. The installer was 11 screens before v0.7.1, then 5 in v0.7.1 (UX-1), then 6 in v0.8.8 (smoke test re-introduced). Agent selection, the cloud-fallback API key, and Python runtime checks now live in Settings, not the installer. If you have inputs from a v0.7.0-or-earlier walkthrough, expect the screens to look different.
2. First run — from Dashboard to approved artifact
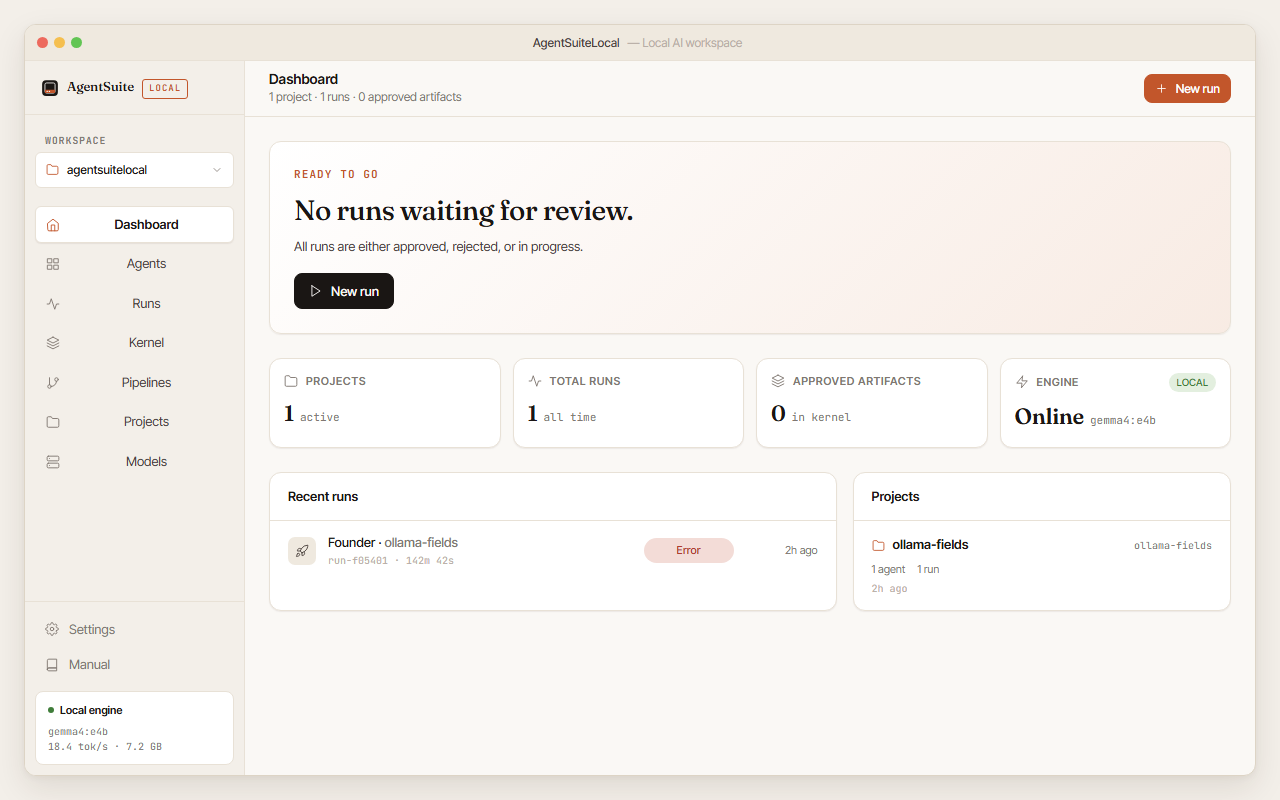 The Dashboard shows your projects, recent runs, engine status, and any runs waiting for your review.
Step 1: Open the app. You’ll see the Dashboard with an engine status card and a “Start a new run” prompt.
Step 2: Click New run (or click an agent card in the Agents view). The New Run screen appears.
Step 3: Fill in three fields:
- Business goal — one sentence. “Launch X for Y in Z” works well. The sharper this is, the better every artifact will be.
- Project slug — a short identifier like
my-product-v2. All runs for the same product should share a slug. Approved artifacts are grouped by this slug in the kernel. - Inputs folder — optional. Drop your existing notes, brand docs, or research into a folder and point the app at it. The Extract stage pulls structured facts from these files.
Step 4: Click Start run. The New Run screen transitions to the Live Run view.
Step 5: Wait — or come back later. The pipeline runs five stages. Each lights up when it starts and shows a checkmark when complete. The whole pipeline takes 9–16 minutes on typical hardware. Closing the Live Run view does not stop the run — it continues in the background. You can also click Cancel at any time to stop the run and save partial artifacts.
Step 6: Review. When QA completes, the Approval Gate opens automatically.
 The approval gate shows every artifact with rendered markdown preview, QA scores across nine dimensions, and the Approve / Reject buttons.
Step 7: Read the artifacts. The file tree on the left lists every artifact the agent produced. Click any file to read it in the centre panel. The right panel shows QA scores across nine dimensions.
Step 8: Approve or reject. If the QA composite score meets the gate threshold (default 7.0), the Approve & promote button is enabled. Click it to copy every artifact to your kernel. If the score is below the threshold, or if the content is wrong, click Reject and run again with a sharper goal — or click Override & approve to bypass the gate with a confirmation.
3. Agent reference
Founder
- What it produces: brand system, positioning statement, voice guidelines, competitor positioning, tone dictionary, messaging hierarchy
- What to write in the goal field: “Launch [your product name], a [category] for [target audience], positioned on [key differentiator]”
- What you’ll get back: ~26 artifacts — brand tone dictionary, positioning statement, voice guidelines, competitor analysis, messaging hierarchy
- Typical runtime: 14 minutes on Balanced tier
- Run this first. The Founder agent’s output becomes the kernel context that Design, Marketing, and other agents inherit.
Design
- What it produces: design briefs, visual language spec, brand QA checklist, icon direction, design principles
- Goal field tip: “Design identity for [product name], expressed as [aesthetic direction]”
- What you’ll get back: ~18 artifacts (the named categories above plus their templates, manifests, and QA scoring files)
- Typical runtime: 9 minutes
- Prerequisite: Founder kernel recommended
Product
- What it produces: UI/UX spec, feature specs, user stories, handoff doc, acceptance criteria
- Goal field tip: “Define the MVP feature set for [product name] targeting [user type]”
- What you’ll get back: ~17 artifacts
- Typical runtime: 12 minutes
- Prerequisite: Founder kernel recommended
Engineering
- What it produces: ADRs (Architecture Decision Records), system design, API specs, runbooks, infrastructure checklist
- Goal field tip: “Design the backend architecture for [product name], a [type] app serving [scale]”
- What you’ll get back: ~17 artifacts
- Typical runtime: 16 minutes
- Prerequisite: Product kernel recommended
Marketing
- What it produces: launch plan, campaign briefs, messaging matrix, social content plan, email sequences, press release
- Goal field tip: “Plan the launch campaign for [product name], targeting [channel] with [offer type]”
- What you’ll get back: ~18 artifacts
- Typical runtime: 11 minutes
- Prerequisite: Founder kernel recommended
Trust / Risk
- What it produces: threat model, controls register, compliance checklist, incident response plan, risk register
- Goal field tip: “Assess the security and compliance risk profile for [product name], a [description]”
- What you’ll get back: ~17 artifacts
- Typical runtime: 13 minutes
CIO
- What it produces: IT strategy, technology roadmap, vendor evaluation matrix, IT architecture brief
- Goal field tip: “Build the IT strategy for [company type] adopting [technology]”
- What you’ll get back: ~17 artifacts
- Typical runtime: 14 minutes
4. The live view — understanding what you’re seeing
 The live run view shows the five-stage pipeline as it progresses, with elapsed timers and a live output log.
Stage indicators
Each of the five stages has a row in the left panel:
- Gray dot: waiting
- Pulsing dot: running now
- Green checkmark: complete
- Red cross: failed — check the error message below
Timing
- Stage timer next to the current stage: “Stage: Extraction · 1m 24s”. Resets each time a new stage starts.
- Total elapsed in the top bar: “Total: 4m 12s”.
- If a stage runs longer than 10 minutes without progress, the model may be stuck — check Ollama status from Settings.
Cancel and reconnect
- Cancel stops the run and saves any partial artifacts to the run folder.
- The “Connection lost — reconnecting” banner appears if the SSE stream drops. The client retries up to 10 times with exponential backoff (1s → 2s → 4s → … capped at 30s). The run continues in the background regardless. If the banner persists, navigate to the Runs view to see status.
QA scores
After the QA stage, nine dimensions appear in the right panel:
- Specificity — how concrete and actionable the content is
- Voice consistency — whether the output maintains a consistent tone throughout
- Audience fit — whether the content speaks to the right people in the right way
- Evidence — whether claims are backed by reasoning or data
- Internal consistency — whether the artifacts agree with each other
- Reusability — how well the artifacts serve as templates for future work
- Actionability — whether there are clear next steps
- Originality — whether the output takes a distinct point of view
- Coverage — whether all required sections and topics are addressed
Each dimension scores 0–10. The composite is a weighted average. The default approval threshold is 7.0 (configurable in Settings).
If the model returns fewer than 9 dimensions, an amber notice appears: “Partial QA scores — the model returned N of 9 dimensions.” This is common with smaller models and doesn’t mean the output is wrong — it means the QA rubric response was truncated.
5. The kernel — what it is and how to use it
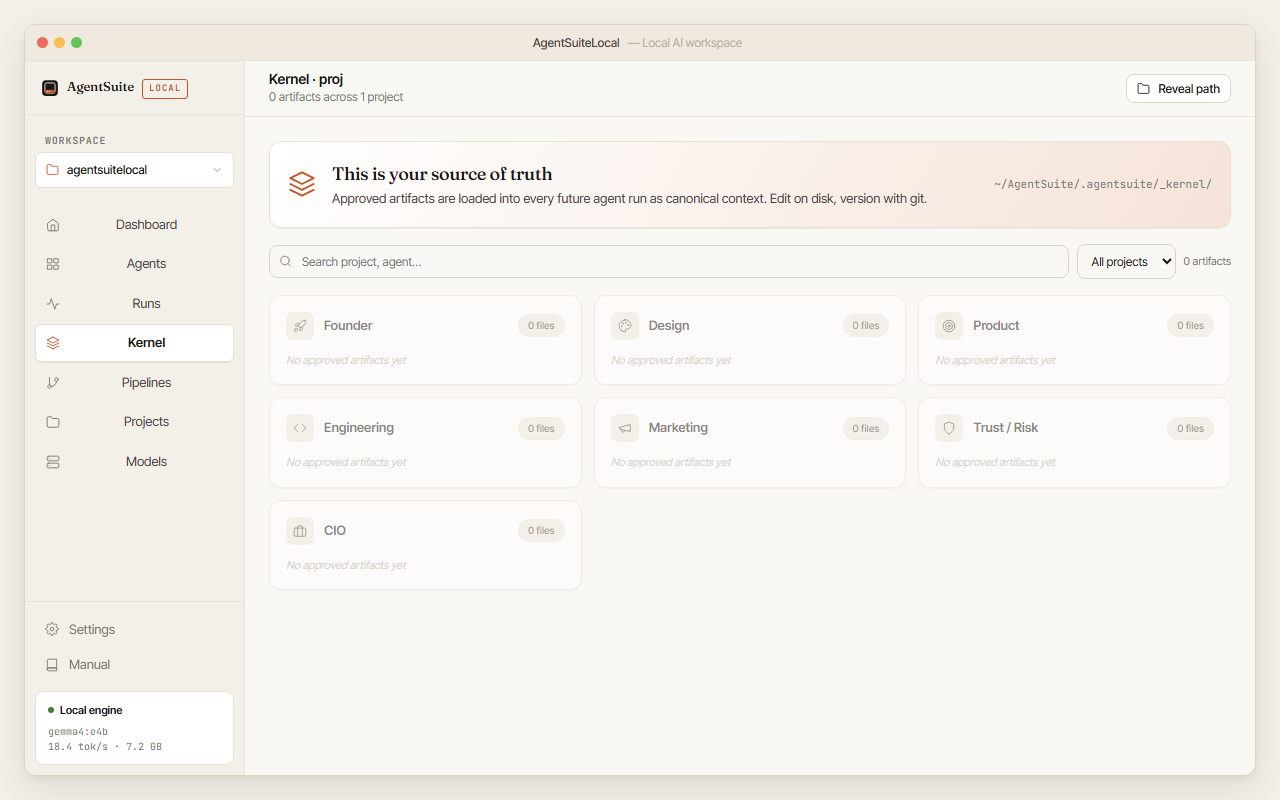 The Kernel view shows all your approved artifacts grouped by project and agent. Click any file to preview it inline.
The kernel is the canonical store of approved artifacts. Every run loads the kernel for its project as context before starting.
Location on disk: ~/AgentSuite/.agentsuite/_kernel/{project}/{agent}/{YYYY-MM-DD-HHMMSS}/
When you approve a run, all its artifacts are copied to the kernel with a timestamped folder. Subsequent runs on the same project see this content as prior context.
The Kernel view lists all approved exports grouped by project, then agent, then reverse-chronological. Each entry shows: agent name, project, timestamp, artifact count, total size, and an Open folder button. Clicking an artifact opens an inline preview rendered as markdown.
Comparing versions: if a project/agent combination has more than one approved export, a Compare button appears. It opens a side-by-side diff: left = selected version, right = latest. A file selector lets you pick which artifact to diff.
Exporting: in the Approval Gate and Run Detail views, an Export dropdown offers:
- ZIP — all artifacts — downloads a zip of the entire run output folder
- Markdown bundle — concatenates all artifacts into a single
.mdfile with---separators - PDF — renders all artifacts as a PDF (pure Python via reportlab; no system runtime required)
6. Pipelines
Pipelines chain multiple agents end-to-end. The output of each agent is passed as context to the next.
- Creating a pipeline: in the Pipelines view, select the agents you want to chain and set the order. Typical sequence: Founder → Design → Product → Engineering.
- Running a pipeline: each step pauses at an approval gate before advancing. Approve a step to run the next agent, or click Override & approve to bypass the QA threshold on that step.
- Resuming after error: if a step fails, click Resume from step N in the Pipelines view to restart from the failed step without re-running earlier ones.
7. Model management
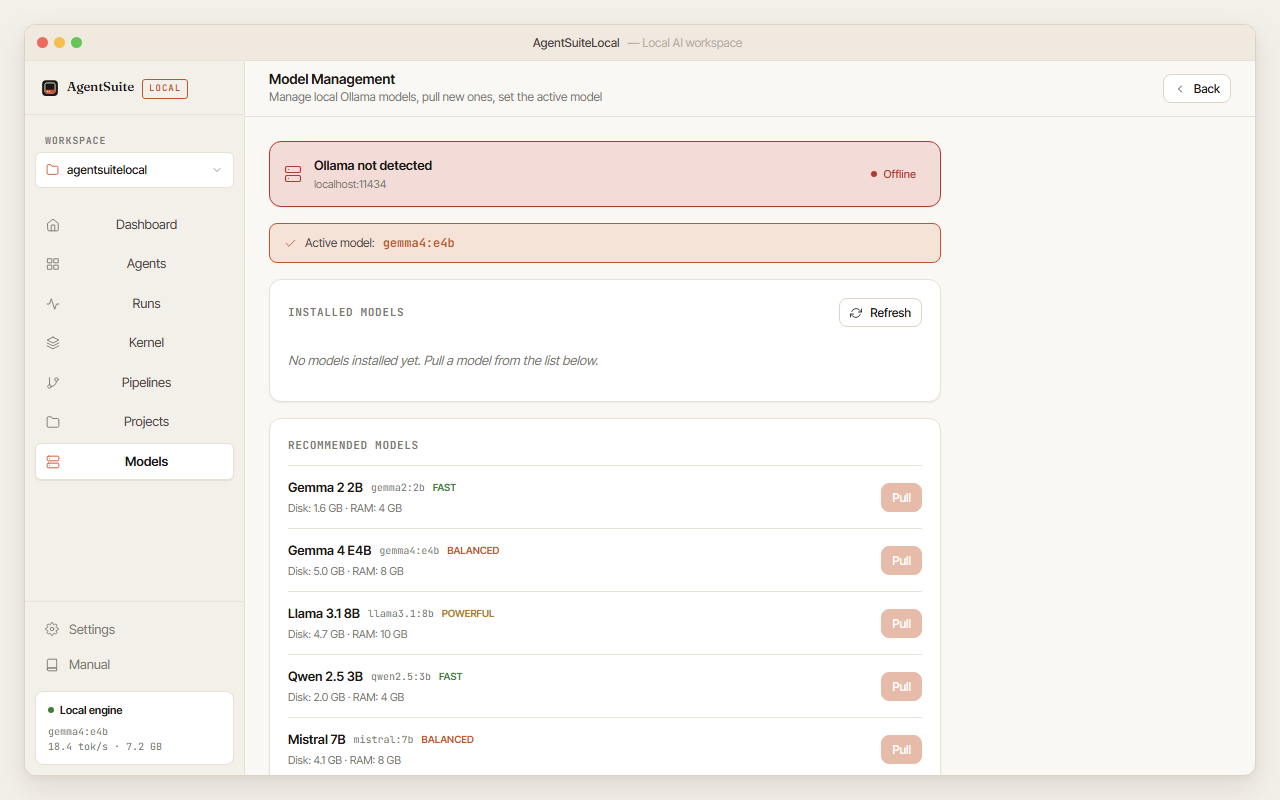 The Model Management screen lets you pull new models, see which is active, and delete ones you no longer need.
Open Settings → Models (or click Models in the sidebar) to manage your local models.
Installed models: lists all models Ollama has pulled, with size and last-used date. Set as active switches the model used for future runs; Delete (with confirmation) removes a model from disk.
Recommended models:
| Tier | Model | Disk | Min RAM |
|---|---|---|---|
| Light | gemma4:e2b |
~3 GB | 8 GB |
| Balanced | gemma4:e4b |
~5 GB | 16 GB |
| Pro | gemma4:26b |
~17 GB | 32 GB |
Click Pull next to any recommended model to download it. A live progress bar shows download progress streamed directly from Ollama.
Any model already in your Ollama library shows up in the Models view — click Set as active to switch. Power users can use Ollama directly to manage advanced model variants outside the app.
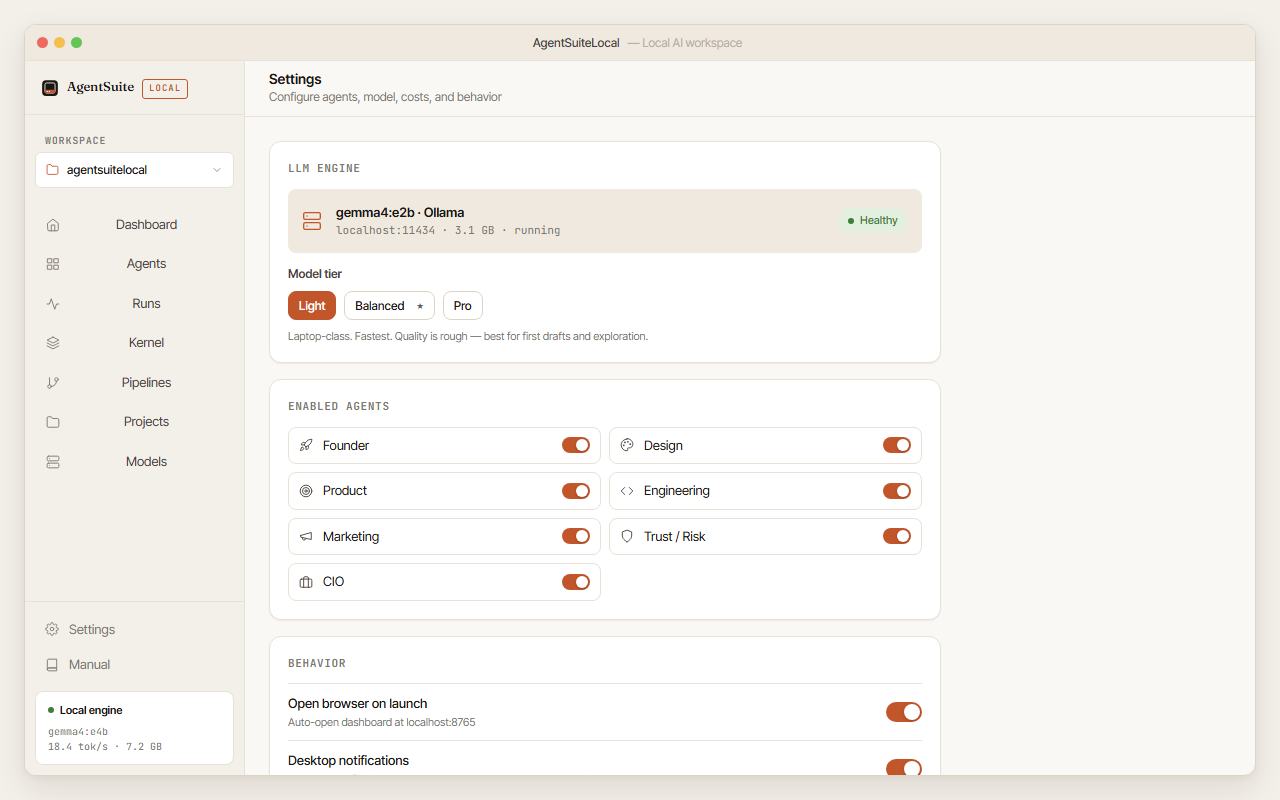
8. Settings reference
Run configuration
| Setting | Default | Description | |———|———|————-| | Model tier | balanced | Which tier to use for all runs | | Run timeout | 15 min | Max time before a run is killed with an error | | QA gate threshold | 7.0 | Minimum composite QA score to enable the Approve button | | Workspace path | ~/AgentSuite | Where runs and the kernel are stored | | Desktop notifications | on | OS toast when a run reaches a terminal state | | Telemetry | off | Local-only JSONL log of app events |
Cloud fallback
When an Anthropic API key is present, the model dropdown gains three cloud options: Claude 3.5 Haiku, Claude 3.5 Sonnet, and Claude Opus 4. Selecting a cloud model routes all future runs through the Anthropic API. A permanent warning reads: “Cloud runs send your goal and context to Anthropic’s servers and incur API costs. Local runs are always free.”
The API key is stored in the OS credential store (Windows Credential Manager, macOS Keychain, Linux Secret Service) — never in settings.json. See SECURITY.md.
Notifications and telemetry
Desktop notifications fire on terminal-state transitions (waiting, approved, rejected, error, cancelled, timeout) and respect your OS Do Not Disturb. Telemetry, when enabled, writes to ~/.agentsuitelocal/usage.jsonl only — nothing leaves your machine.
Uninstall
Settings → Danger zone → Uninstall AgentSuiteLocal opens a three-phase flow:
- Shows your workspace size and asks whether to delete all run data.
- Asks whether to delete the Ollama model.
- Calls the system uninstaller (Windows: Add/Remove Programs entry; macOS: removes the .app).
9. Troubleshooting
The installer is stuck on “Ollama & model download” and Continue never lights up. The AI engine isn’t running yet. Look for the Ollama icon in your system tray (Windows) or menu bar (macOS) — a small llama head. If you don’t see it, open the Ollama app you installed. Once the icon appears, the installer should unlock within a few seconds. If you haven’t installed Ollama, get it from ollama.com/download.
Model download fails after 3 attempts. Check your internet connection. Ollama pulls from Ollama’s servers — if those are unreachable, the download fails. Try again when connectivity is restored. If the download partially completes but the screen reports “Model download appears incomplete”, click the one-click re-pull button.
A run starts but immediately shows an error. The most common cause is Ollama not running. Check the engine status card on the Dashboard — it shows “Not running” if Ollama has stopped. Restart Ollama and try again. If the same step fails twice, open an issue with the error message.
Run shows “Timed out after 15 minutes.” The model stopped responding mid-run. Options: (a) increase the run timeout in Settings → Run timeout, (b) switch to a lighter model tier, (c) reduce the size of your inputs folder, (d) verify Ollama is still running — it can crash under memory pressure.
The run finished but QA score is below 7.0. Usually the goal was too vague. Sharpen it, add an inputs folder with real context, or switch to a higher model tier. A score of 6.5+ on a small model often improves to 8.0+ on Balanced with the same goal.
Approve button is greyed out despite a score above 7.0. The QA gate threshold may have been raised in Settings above the current score. Either lower the threshold or click Override & approve (amber button) to bypass with a confirmation dialog.
QA dimensions show “partial QA scores” notice. The model returned fewer than 9 dimensions — common with smaller models. Scores shown are still valid; the composite is calculated from what was returned. Switch to Balanced or Pro for full 9-dimension scores.
The artifacts look cut off or much shorter than expected. Usually the Light tier running out of context window. Switch to Balanced or Pro and re-run.
“Connection lost — reconnecting” appears in the Live view. The SSE connection dropped. The app reconnects automatically (up to 10 attempts with backoff: 1s → 2s → 4s → 8s → 16s → 30s). The run continues in the background. If reconnection fails, navigate to Runs to check status.
Kernel files are not showing up in the Kernel view. A run must be approved before its artifacts appear in the Kernel. Verify the run shows “approved” in Runs. If the kernel is empty after approval, check the workspace path in Settings — the kernel lives under that path.
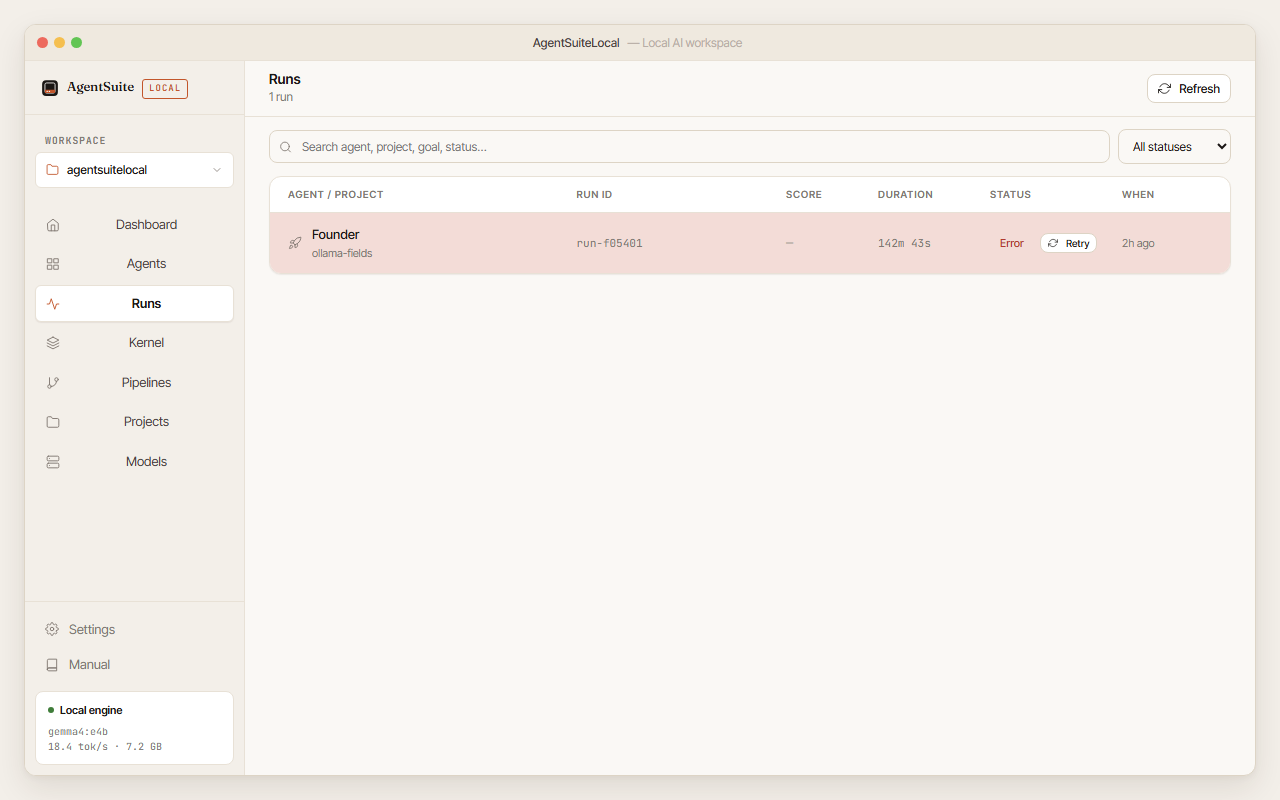
Retry button doesn’t pre-fill the goal field.
Runs created before v0.7.0 may not have a goal field. Fill it in manually for those runs. All v0.7.0+ runs save the goal automatically.
Desktop notifications are not appearing. Windows: Settings → System → Notifications → AgentSuiteLocal. macOS: System Settings → Notifications → AgentSuiteLocal. Also confirm the Desktop notifications toggle is on in AgentSuiteLocal Settings.
The app opens to the installer on every launch.
The setup-complete state is stored in the browser’s localStorage under agentsuite_setup_complete. If the value is cleared (private browsing, profile reset, etc.) the installer reappears. Walk through the installer once and it persists.
PDF export fails. PDF export uses reportlab, which is pure Python and requires no system runtime. A failure usually means the run has no artifact files yet. Ensure the run has completed at least one step and reached the approval gate before exporting. If the error persists, the backend log will show the underlying exception.
Antivirus flags the installer or .exe.
Some AV tools flag PyInstaller-bundled executables as suspicious — a known false positive. Add the install folder to your AV exclusion list, or upload the .exe to virustotal.com to verify independently.
Building from source? Common build problems (PyInstaller, Vite top-level await,
iscc not found, pytest import errors) are documented in CONTRIBUTING.md, not here.
10. FAQ
See docs/FAQ.md for the full list. Short answers to the most common ones:
- Does any data leave my machine? No, by default. Only opt-in cloud calls (update check, Anthropic) leave the machine.
- Can I cancel a run? Yes — Cancel button on the Live Run screen.
- Can I edit artifacts before approving? Yes — they’re plain markdown at
~/AgentSuite/.agentsuite/runs/{run-id}/. The Approval Gate re-reads the files at approve time. - How do I update? A non-blocking banner appears on the Dashboard when a new release is available. Click Download to open the Releases page.
- Can I run multiple agents in parallel? Not yet. Pipelines queue agents sequentially with approval gates between steps.
- Can I run multiple runs at the same time? No. v1.0 supports one active run (or pipeline step) at a time per session. Concurrent runs land in v1.1.
- What Python version is required? 3.11 or 3.12 — but only for development. The bundled distributable ships its own Python runtime.
Found something confusing or wrong in this manual? Open an issue — user manuals only stay honest when readers push back.